

OData (Open Data Protocol) is a standardized way to expose data from Mendix applications, making it easily accessible for external systems like Power BI, Excel, and third-party applications. In this article, I will walk you through the step-by-step process of publishing OData in Mendix, covering entity exposure, security settings, and best practices. By the end, you’ll be able to seamlessly share your Mendix data using OData services.
First create the Mendix application in any version. Here, I am using 9.24.26
-> Open Mendix studio pro
-> Create new app
-> Select Blank web app
Publishing OData for an Entity Without Associations :-
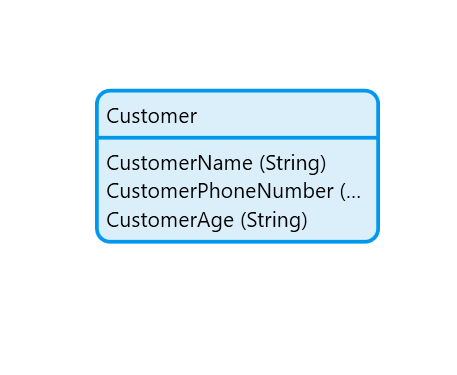
Go to MX Studio Pro and create an entity & give any name like “Customer” & add your data in this entity.
Go to MX Studio Pro create a folder PublishOData -> right click on it-> click on other->Published OData Service & give the name POS_Customer.

Go to POS_Customer -> Add your Customer entity. After selecting your entity we have to choose atleast one key attribute. These attributes should never be empty and should together form a unique identifier.
Here, I am selecting CustomerPhoneNumber as key attribute.


After selecting key attributes, we need to define the operations that external consumers can perform on our exposed entity. We can enable CRUD (Create, Read, Update, and Delete) operations.
But here , I am enabling only read & update operations. We can also call a microflow from the dropdown if we want to apply conditions using XPath or custom logic, but for now, we will keep it as Database.

We need to add a unique validation rule for the CustomerPhoneNumber attribute because we are using it as the key attribute, and a key attribute must be a unique identifier.

After this, go to the Settings tab, copy the generated links, and keep them safe for future use.

If you want to test this in postman -> Go to POS_Customer -> Double click on Customer entity -> Copy the example of location.


Publishing OData for an Entity With Associations :-

Go to MX Studio Pro create a folder PublishODataForAssociation -> right click on it-> click on other->Published OData Service & give the name POS_Author_Book.
Go to POS_Author_Book -> Add your Author entity & select identifier attribute as key attribute.


Define your operations. I am defining only read & update operations.

Go to again POS_Author_Book -> Add your Book entity & select identifier attribute as key attribute.


Define your operations. I am defining only read & update operations.

After clicking Ok you will get this pop up, Would you like to publish the other side of this association as well? Click Yes.

Go to settings tab, Make sure to select associations as a link. Copy the generated links, and keep them safe for future use.


Conclusion:
I hope this article has helped you understand How to Published OData in Mendix.
Thanks for reading this! See you in the next blog post.