

Boost user interaction with your Mendix Native apps using local notifications. This blog walks you through the implementation process, with clear examples and tips.
This guide explains how to create local notifications for native mobile applications. Local notifications are designed to schedule and display notifications solely on the user’s device, without requiring an internet connection. A common example of local notifications is an alarm application that triggers a notification after a specified duration.
Go to your MX Studio Pro,
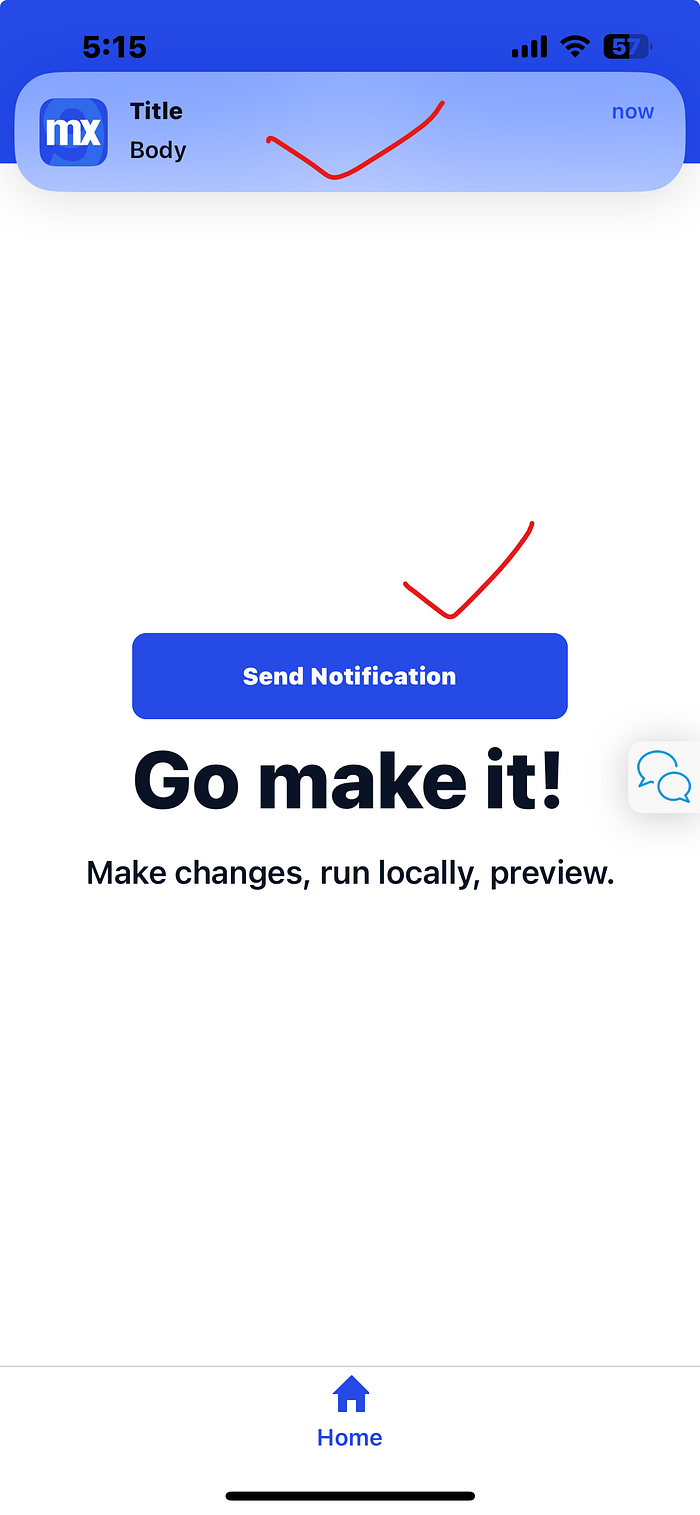
1.Open Home_Native page -> Drag & Drop a button(Send Notification) -> In the OnClick events select call a nanoflow & Create a new nanoflow(ACT_SendNotification).

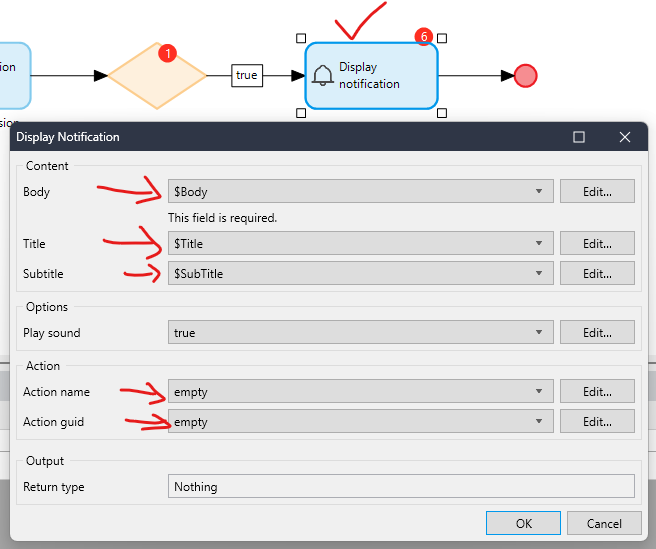
2. Open your ACT_SendNotification nanoflow & Drag 3 create variable activity & Give the name Title, SubTitle, Body.
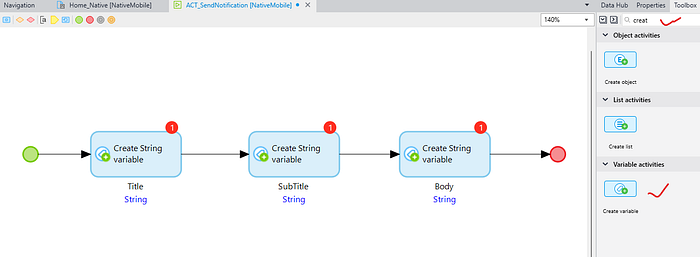
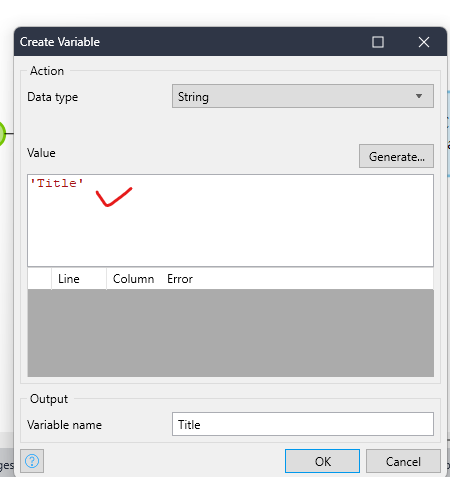
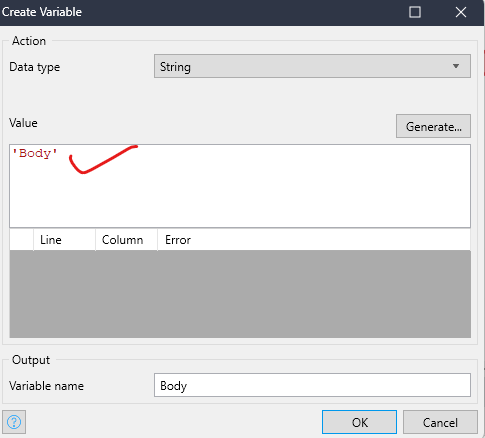
3. Open your 3 create activity one by one & Give some static value what you want(‘Title’, ‘SubTitle’, ‘Body’).

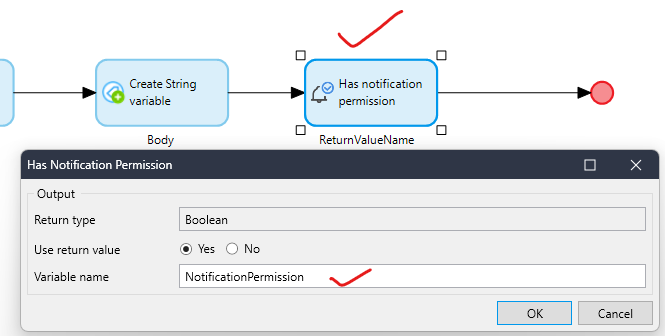
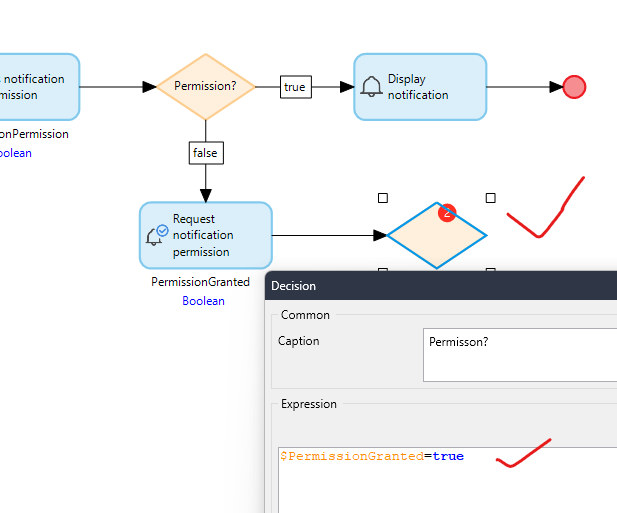
4. Drag Has notification permission & Give the variable name NotificationPermission.
5. Drag a Decision & Check the condition $NotificationPermission=true

If condition is true -> Drag the Display Notification activity & Configure all the value.
If condition is false -> Drag the Request Notification Permission activity & Give the variable name PermissionGranted.

6. Drag another Decision & Check the condition $PermissionGranted=true
If condition is true -> Drag a merge before DisplayNotification & Build your connection from decision to DisplayNotification.
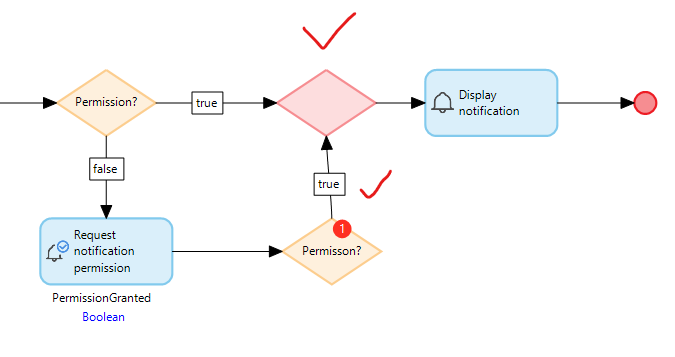
If Condition is false -> Drag a Show Message activity & write this message
‘No notification permissions, go to your app permission settings to grant permission.’ and end the flow.

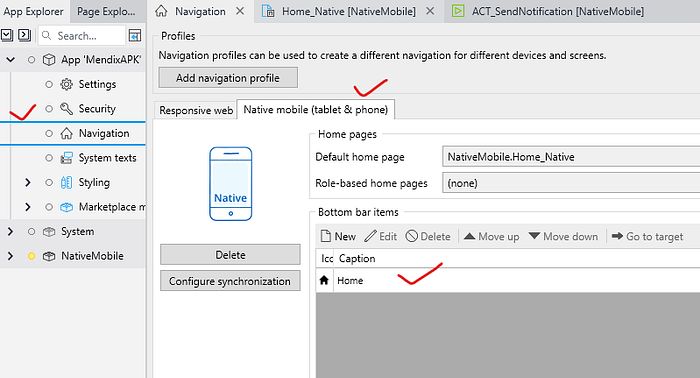
Lastly, Just make sure your Home_Native page should be added in the native navigation.
Now run the application & test it.
Conclusion:
I hope this article has helped you understand How to Implement Local Native Notifications in Mendix.
Thanks for reading this! See you in the next blog post.