

Final Chapter of the OQL Series: Master the art of integrating JSON Exporter with OQL in Mendix to effortlessly convert complex query results into JSON for seamless data sharing, powerful integrations, and enhanced app performance.
Dependencies:
Getting started
First, create the Mendix application in any version. Here, I am using 9.24.34
-> Open Mendix Studio pro
-> Create a new app
-> Select Blank web app
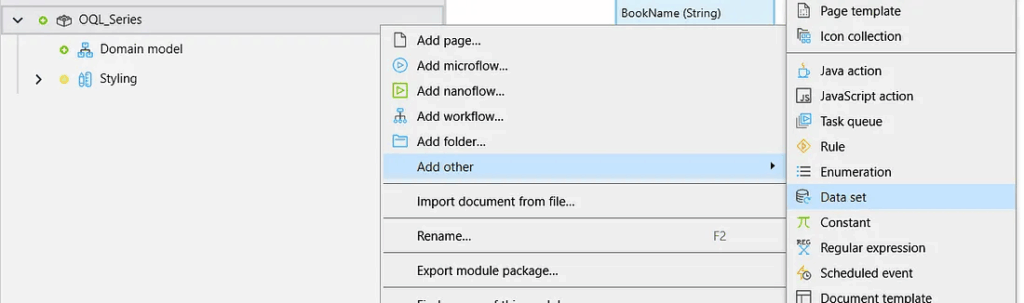
Right-click on MyFirstModule or YourModuleName(OQL_Series) -> Add Other -> Data Set -> Give any name(OQL_JSONExporter) & Click Ok.
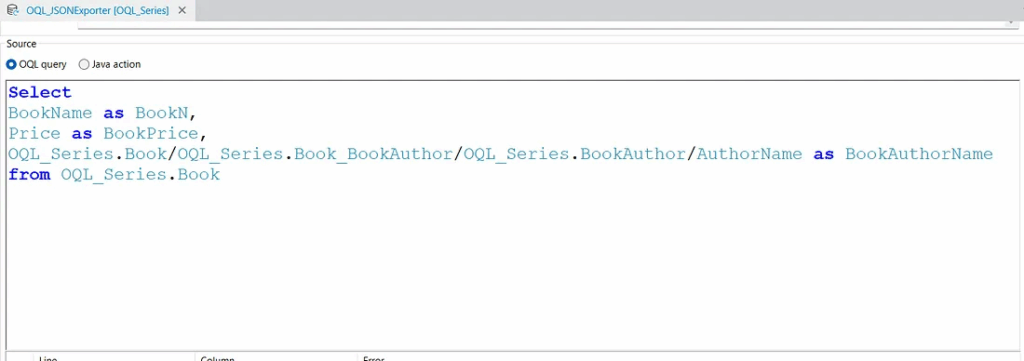
Open your OQL_JSONExporter data set by double-clicking and writing the below OQL statement.
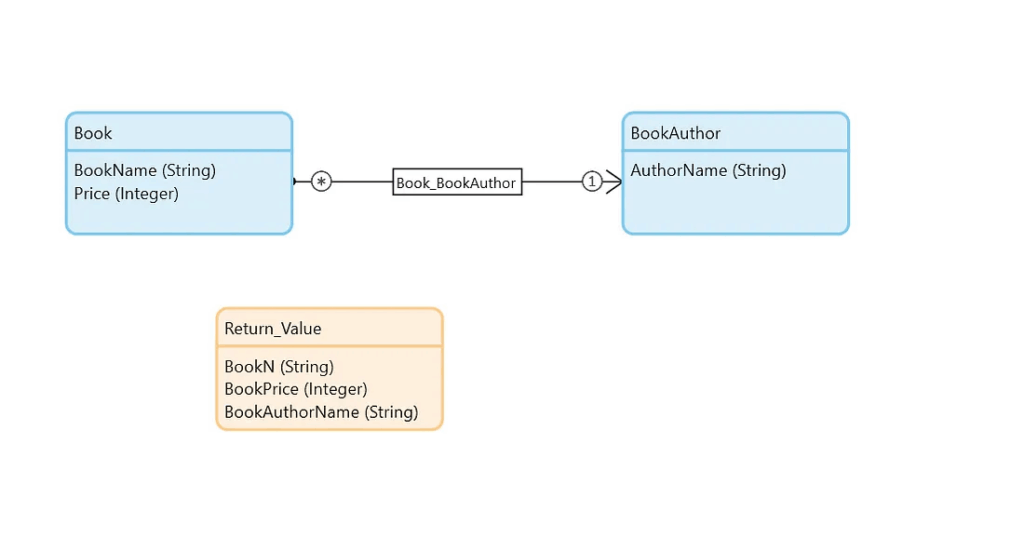
Select
BookName as BookN,
Price as BookPrice,
OQL_Series.Book/OQL_Series.Book_BookAuthor/OQL_Series.BookAuthor/AuthorName as BookAuthorName
from OQL_Series.Book
BookName, Price, and AuthorName are the attribute names of a persistable entity. Use these exact names as defined in the entity. The module name is OQL_Series, and you can select your entity by using a dot (.) notation.
Whenever you use the “as” keyword (for example, BookName as BookN), you need to create a Non‑persistable Entity (NPE) as the return type, ensuring that the attribute name exactly matches the one specified after the as keyword (in this case, BookN).
Whenever you work with an association, you must use the “as” keyword (for example, BookName as BookN) and create a Non‑persistable Entity (NPE) as the return type. Without the “as” keyword, you cannot write the OQL query.
JSON EXPORTER
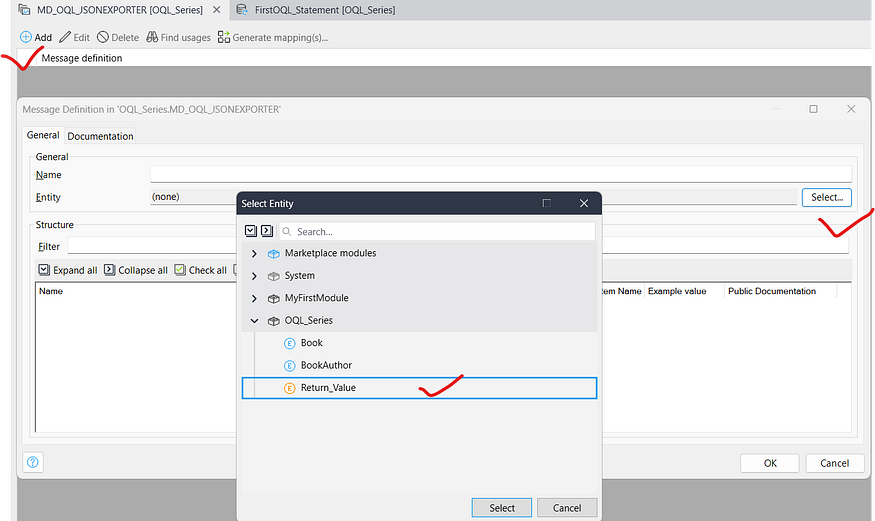
Right-click on MyFirstModule or YourModuleName(OQL_Series) -> Add Other -> Message Definitions -> Give any name(MD_OQL_JSONEXPORTER) & Click Ok.

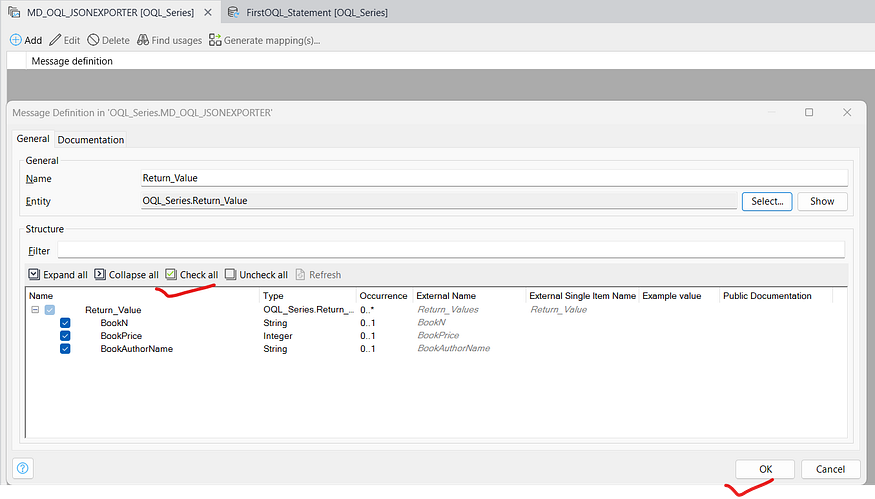
Open your MD_OQL_JSONEXPORTER by double clicking & clicking on Add and selecting your Return_Value entity & check all.
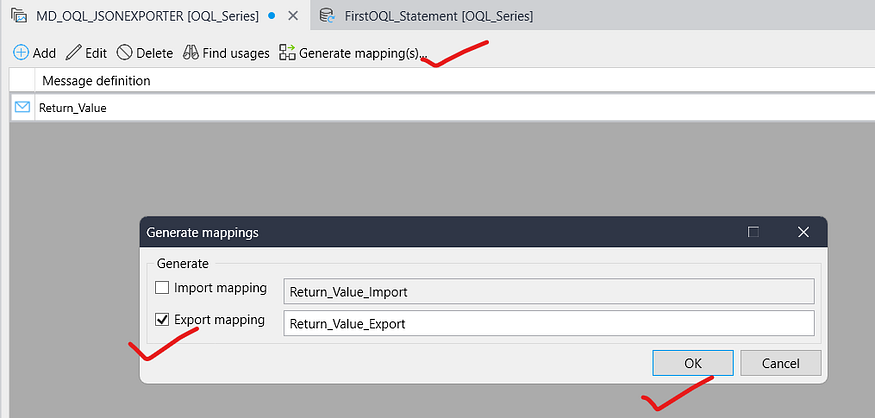
Go to again your MD_OQL_JSONEXPORTER & Click on Generate mapping(s) to generate the export mapping and select only export mapping for this tutorial & click ok.
Now make a microflow & give any name (DS_ExecuteOQL_JSONExporter) to execute the OQL_JSONExporter.
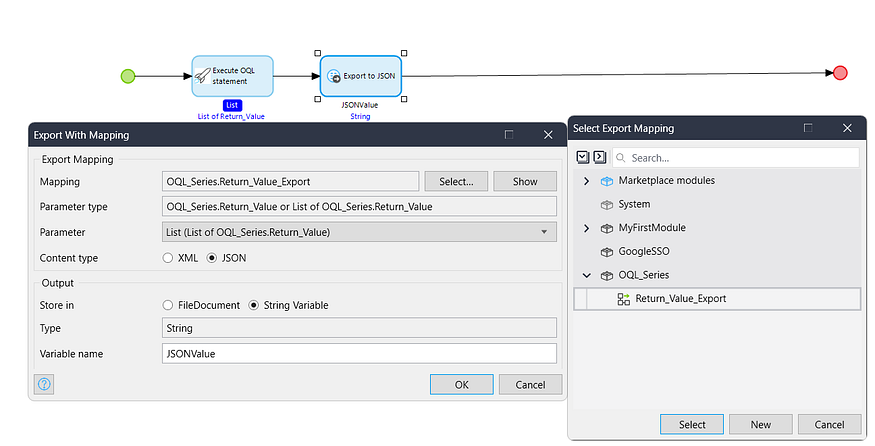
- Open your DS_ExecuteOQL_JSONExporter microflow & drag the activity Execute OQL Statement & configure the value.

2. Drag the Export With Mapping activity & configure the value.
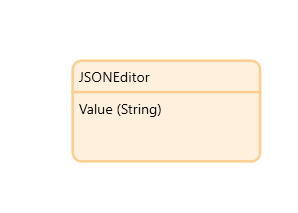
3. Drag Create Object activity -> Create a non-persistable JSONEditor entity object & pass the $JSONValue inside this & return $NewJSONEditor object.

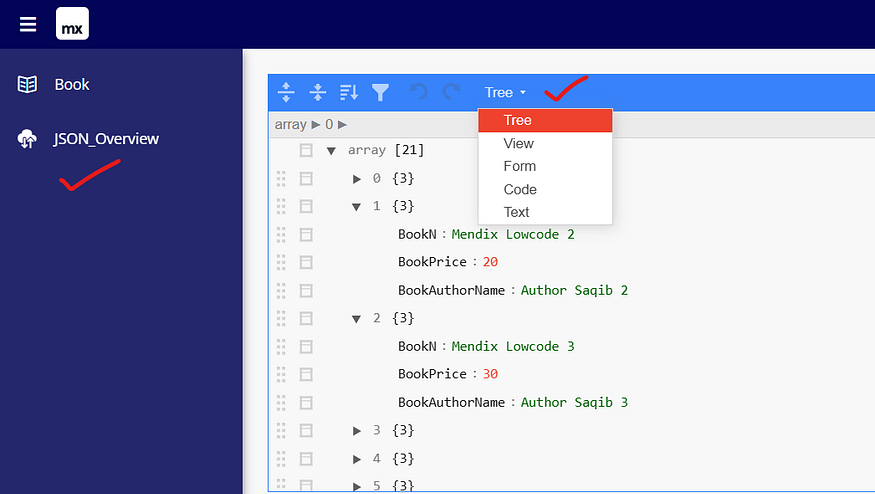
4. Make a page(JSON_Overview) to show the JSONValue -> Open your JSON_Overview Page -> Drag a Dataview -> Select DataSource as microflow -> Select your DS_ExecuteOQL_JSONExporter microflow.
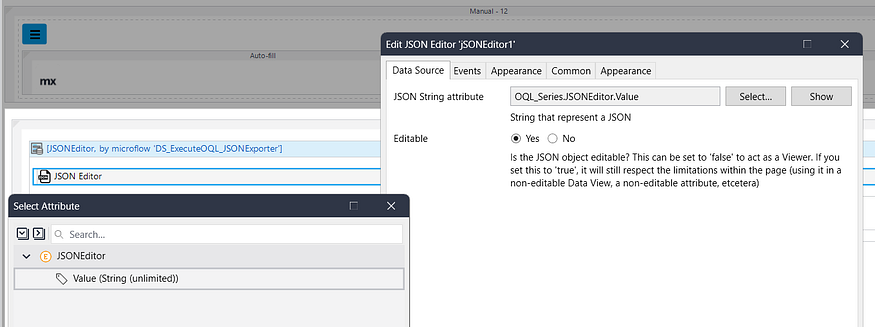
5. Drag the JSON Editor widget inside Dataview & select the value attribute.
Now add this page (JSON_Overview) on the navigation & test it.
Conclusion:
I hope this article has helped you understand How we can Combine JSON Exporter and OQL in Mendix.
Thanks for reading this! See you in the next blog post.