

In this guide, we will explore how to implement Custom Authentication for OData services in Mendix. Unlike basic authentication (username & password), custom authentication allows for token-based authentication, API keys, OAuth, or JWT tokens to enhance security and control access.
Open your first application from where you published OData services.
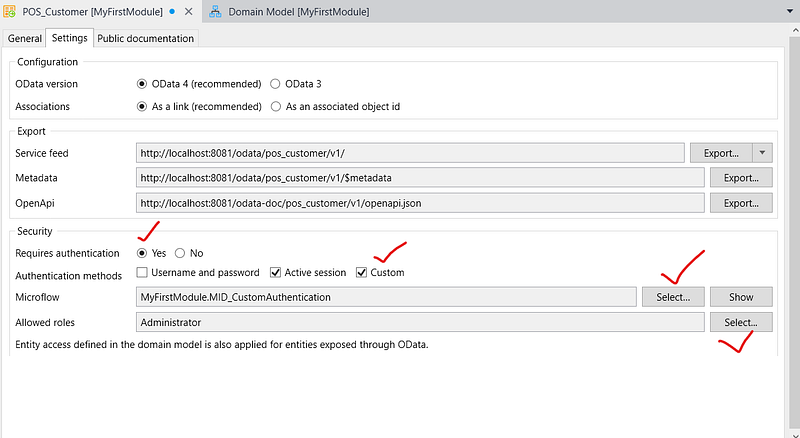
Open your POS_Customer (Your Published OData Service) → Go to the Settings tab, uncheck the box from Username and Password & Check the box for Custom, and in the Allowed Roles section, select Administrator (You can choose any role based on your requirement, but for this tutorial, I am selecting Administrator).
In the microflow -> Create a new microflow MID_CustomAuthentication.
Open your MID_CustomAuthentication microflow & give the security as Administrator.Also give the Administrator access to Customer entity.
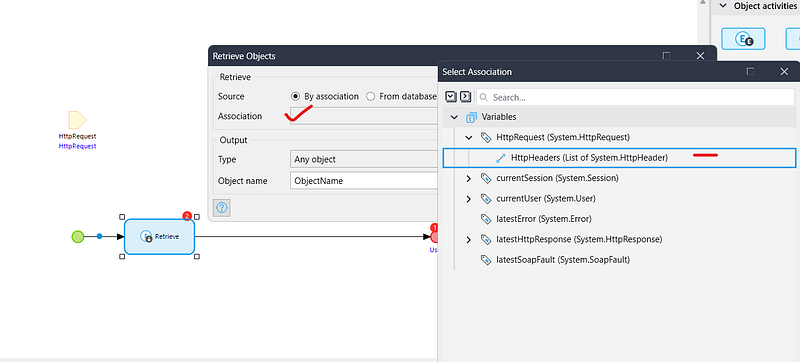
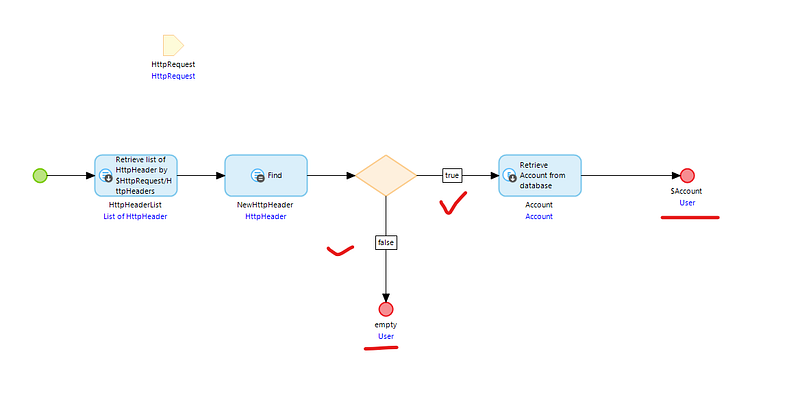
- Take a retrieve activity and retrieve HttpHeaderList from association.
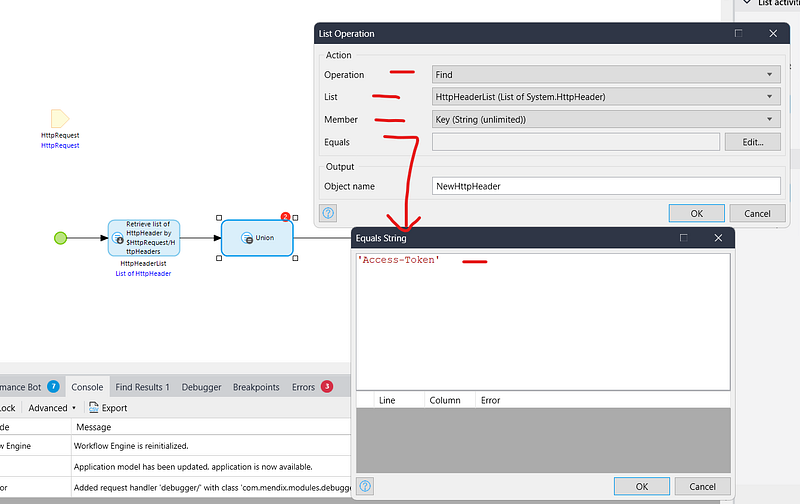
2. Take a list Operation -> in the operation select find -> in the list select HttpHeaderList -> in the member select Key & in the Equals pass ‘Access-Token’.
IMPORTANT :- You can make your own headers key & value here, I am making Access-Token as key & 123456 as value.
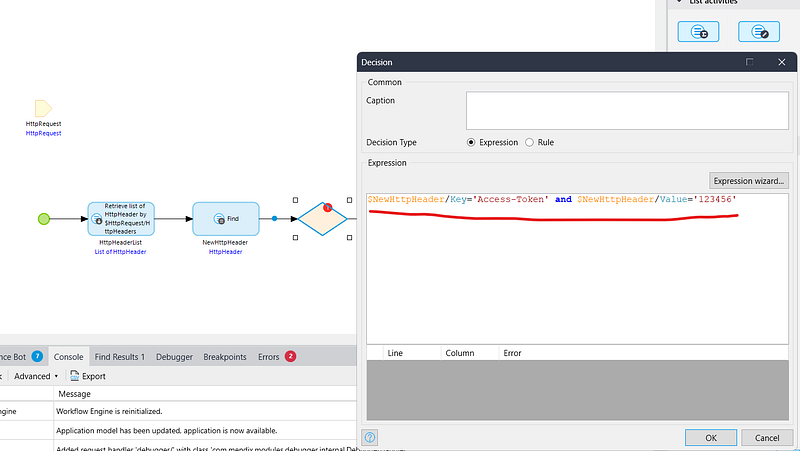
3. Take a decision & check the below condition
$NewHttpHeader/Key=’Access-Token’ and $NewHttpHeader/Value=’123456'
4. If condition is false return empty object.
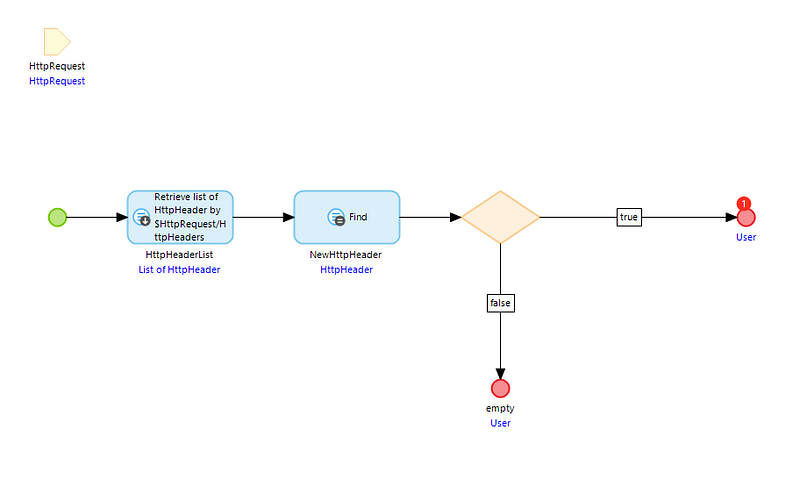
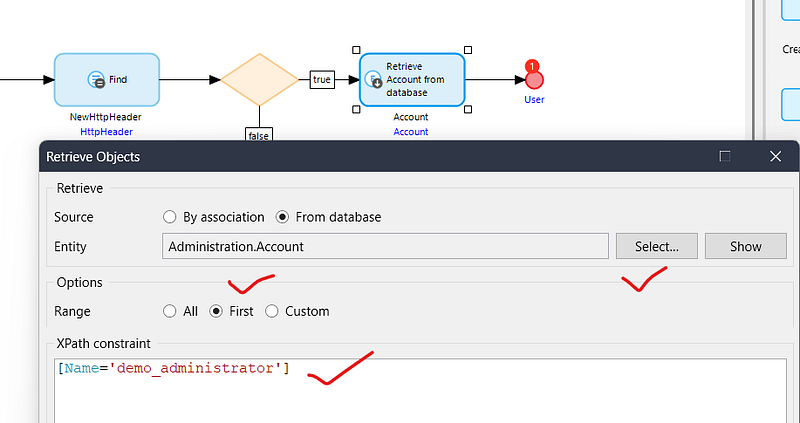
5. If condition is true retrieve your user from account entity & return them.
IMPORTANT :- Retrieve that user who has access of allowed roles & who has access of MID_CustomAuthentication microflow. I selected administrator that’s why, I will retrieve demo_administrator. If you selected a different user, make sure to retrieve that specific user instead.
Now Open your second application from where you Consumed OData services.
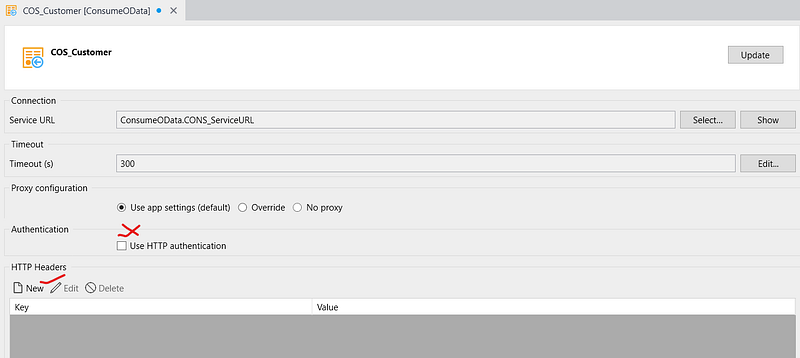
Open your COS_Customer (Your Consumed OData Service) -> Uncheck the box from Use HTTP Authentication & Click on New HTTP Headers. Then paste your key & value.

Make sure you have configured your security successfully.
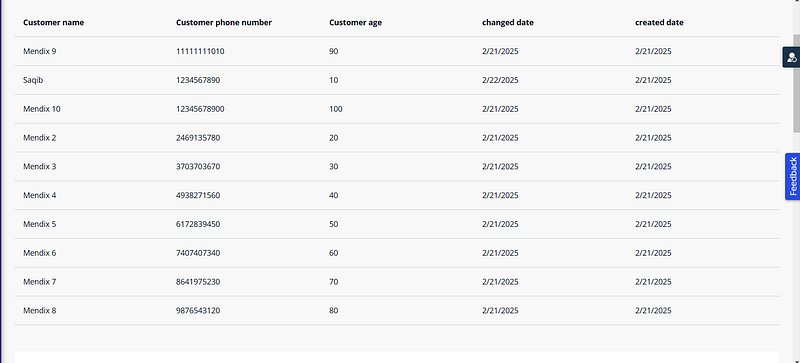
Now run the application & test it.
Conclusion:
I hope this article has helped you understand How to implement Custom Authentication in Mendix OData.
Thanks for reading this! See you in the next blog post.