

In this part of the series, you’ll learn how to securely consume APIs that require custom authentication — beyond the default username/password or token-based approaches.
Dependencies:-
Published CUSTOM AUTHENTICATION API
You can find the published API endpoint URL below. For a better understanding of how this API was created, please refer to the previous article linked above.
Endpoint URL :- http://localhost:8082/rest/prssecurity/v1/Security?BookName={BookName}&Price={Price}
headers :-
{1}
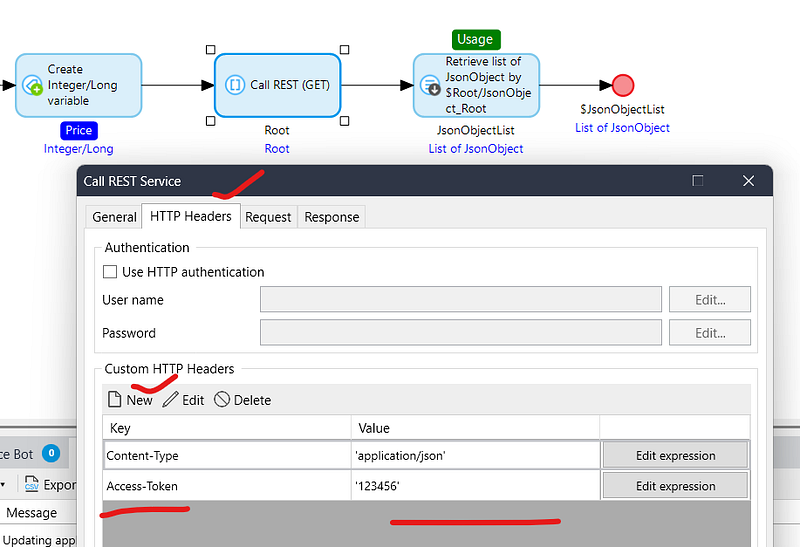
Key : Access-Token
Value : '123456'
{2}
Key: Content-Type
Value :'application/json'
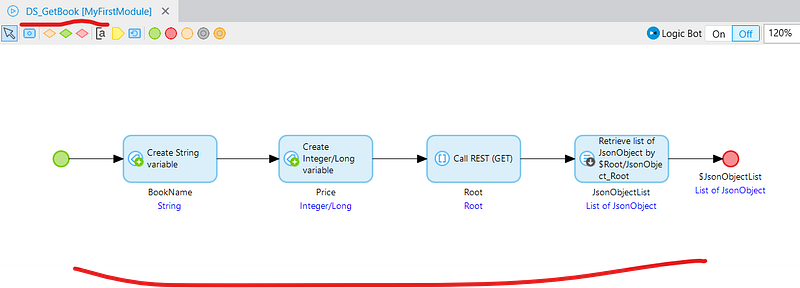
Go to MX Studio Pro, Open your previously created(Consumed API Series Part 5) DS_GetBook microflow.
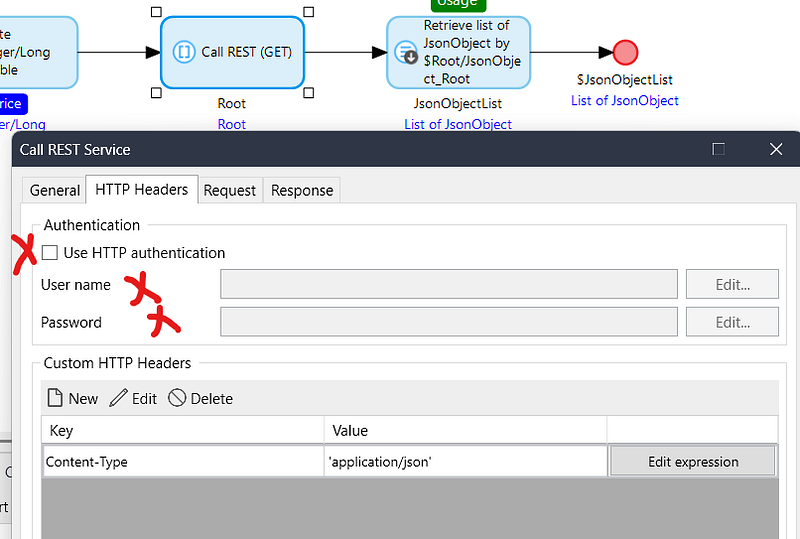
Double click on Call REST Service & Go to HTTP Headers tab
1.Remove Username & Password and uncheck Use HTTP Authentication.
2. Add one more Custom HTTP Headers with above value Access-Token & ‘123456’.
Now run the application & test it.
Important:
Since you’re using two different Mendix applications — one to publish the API and another to consume it — make sure the application where the API is published on localhost is running before making any API calls from the other app. If the publishing app isn’t running, the API request will fail.
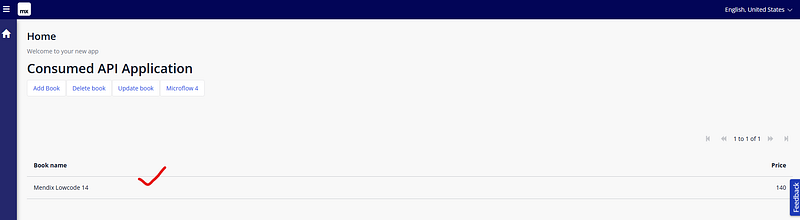
The grid is showing only one record because there’s only one exact match available.
Conclusion:
I hope this article has helped you understand How to Consume Custom Authentication API in Mendix.
Thanks for reading this! See you in the next blog post.