

While traditional username and password authentication works well for many use cases, some scenarios require tailored authentication mechanisms. Custom authentication allows you to implement advanced and flexible security measures tailored to your application’s specific needs.
In this blog, we’ll explore:
What custom authentication is and when to use it.
Implementing custom authentication logic in Mendix.
Testing custom authentication with external tools.
By the end of this blog, you’ll know how to design and implement custom authentication mechanisms in Mendix APIs to provide enhanced security and functionality.
Dependencies:-
Username & Password Authentication
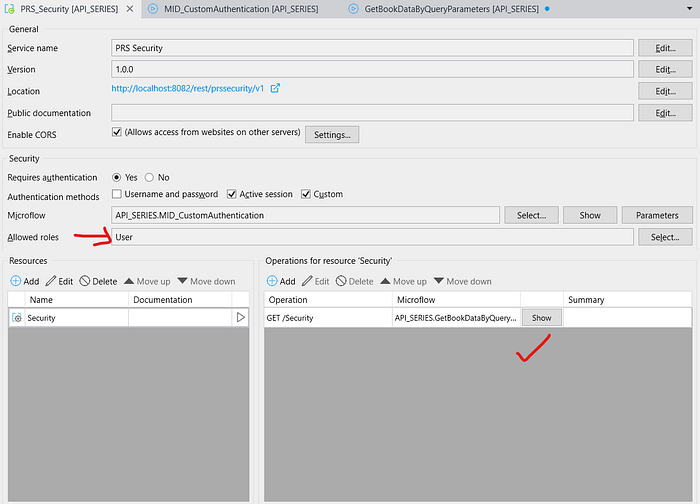
Go to your PRS_Security -> uncheck Username & password -> check mark on custom and make a new microflow MID_CustomAuthentication.
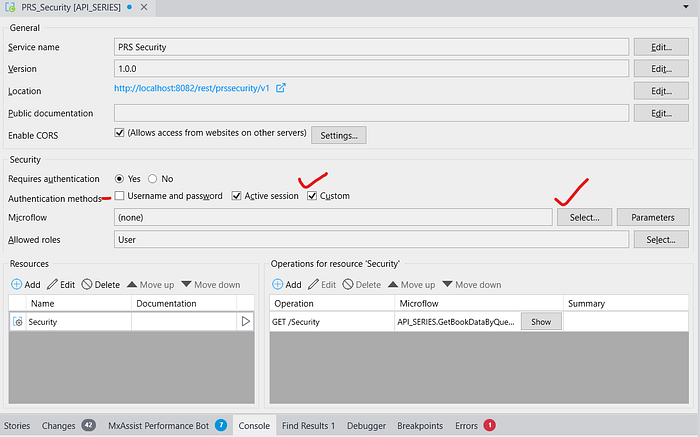
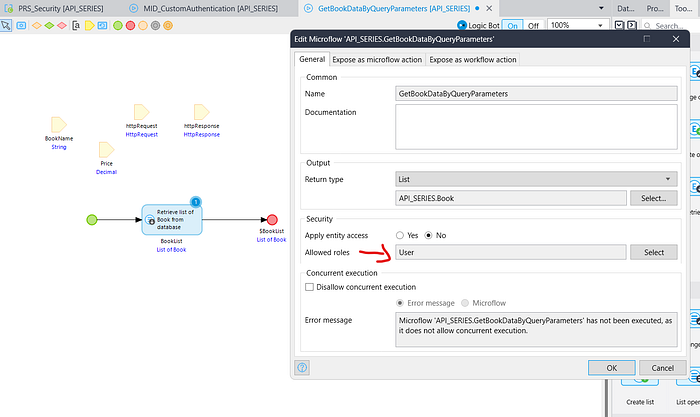
Open your MID_CustomAuthentication microflow & give the security as User.
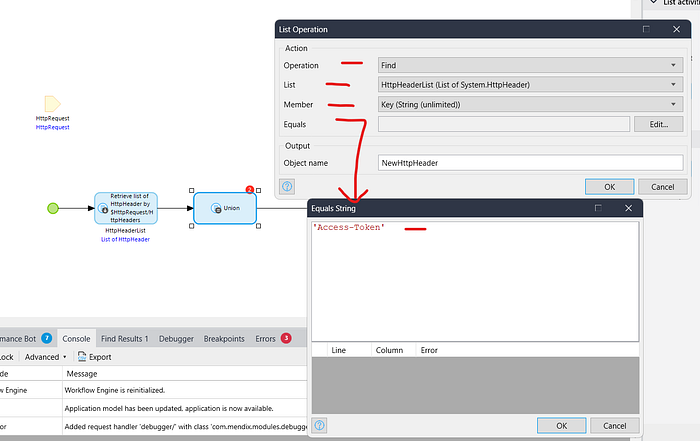
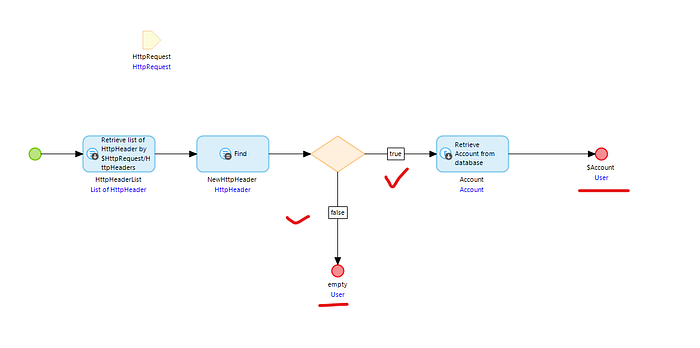
- Take a retrieve activity and retrieve HttpHeaderList from association.

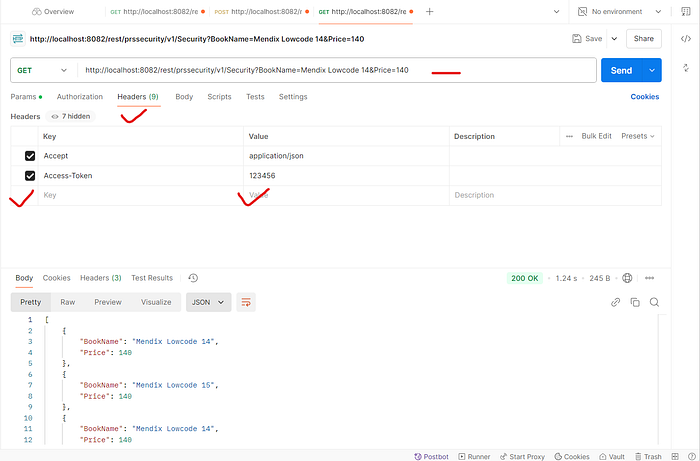
2. Take a list Operation -> in the operation select find -> in the list select HttpHeaderList -> in the member select Key & in the Equals pass ‘Access-Token’.
IMPORTANT :- You can make your own headers key & value here, I am making Access-Token as key & 123456 as value.
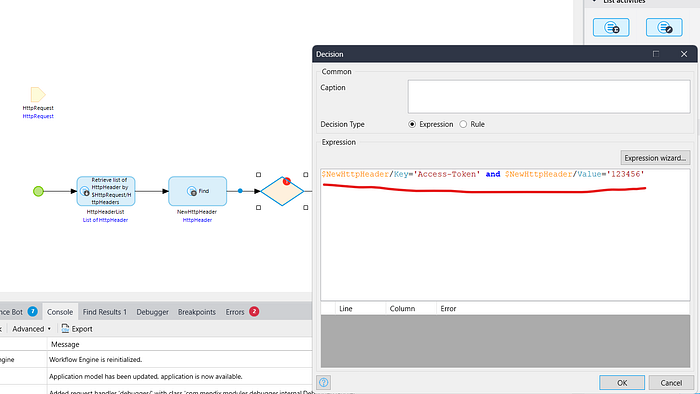
3. Take a decision & check the below condition
$NewHttpHeader/Key=’Access-Token’ and $NewHttpHeader/Value=’123456'
4. If condition is false return empty object.
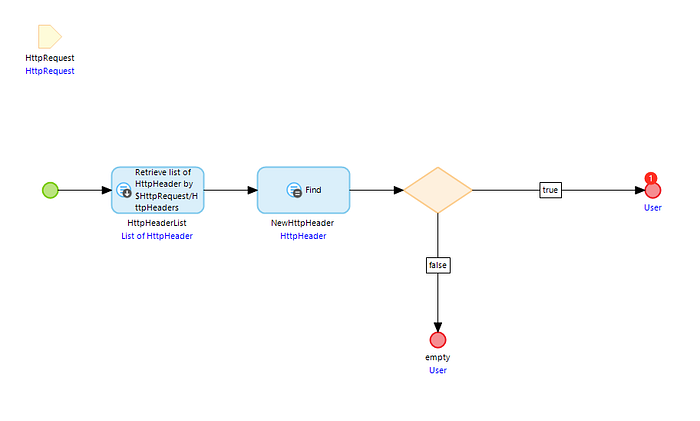
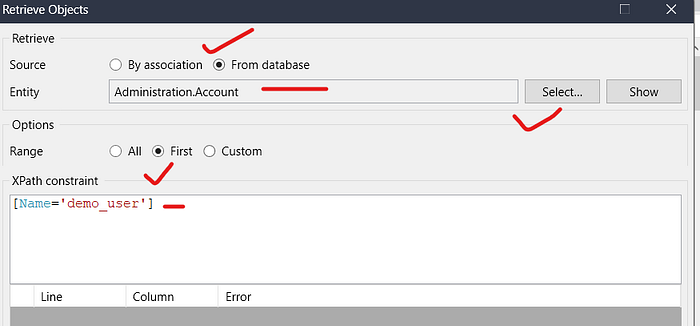
5. If condition is true retrieve your user from account entity & return them.
IMPORTANT :- Retrieve that user who has access of allowed roles & who has access of GetBookDataByQueryParameters microflow.I selected User that’s why, I will retrieve demo_user. If you selected a different user, make sure to retrieve that specific user instead.
Now run the application & test it.
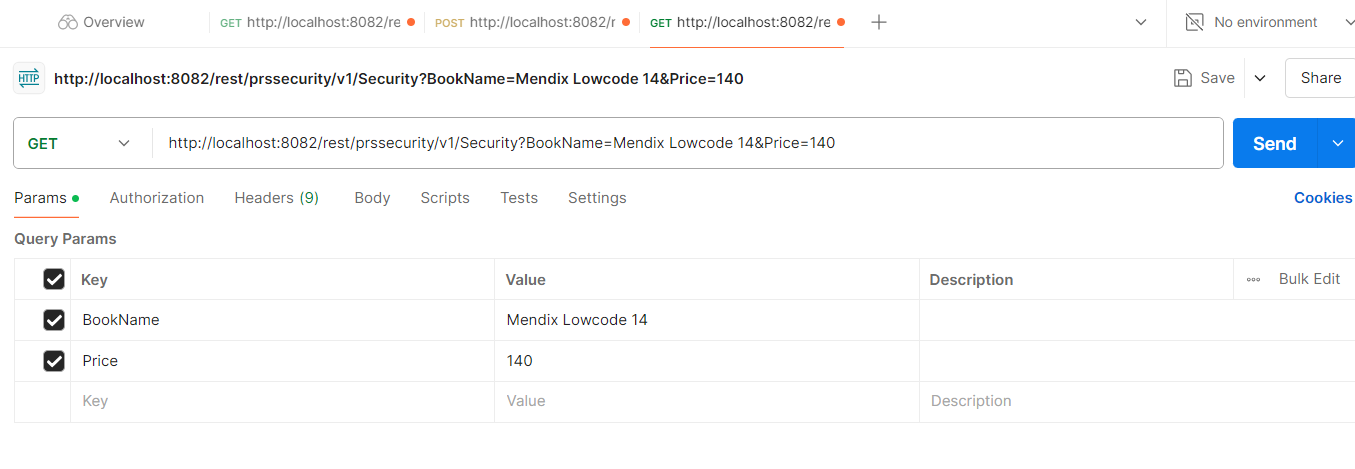
http://localhost:8082/rest/prssecurity/v1/Security?BookName={BookName}&Price={Price}
Conclusion:
I hope this article has helped you understand How to implement Custom Authentication in Mendix APIs.
Thanks for reading this! See you in the next blog post.