

In this blog, we’ll explore how to create a GET API in Mendix to expose data from your application. A GET API allows external systems to retrieve specific information via HTTP requests. Let’s walk through the process step by step.
First create the Mendix application in any version. Here, I am using 9.24.5
-> Open Mendix studio pro
-> Create new app
-> Select Blank web app
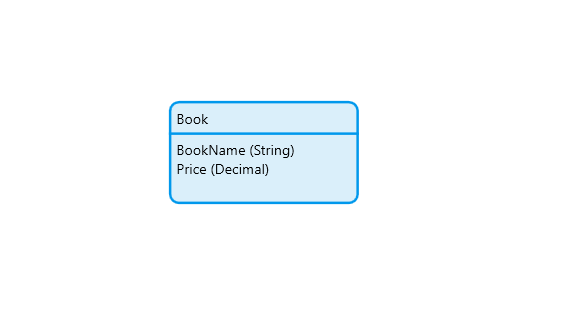
Go to MX Studio Pro and create an entity & give any name like “Book” & add your data.
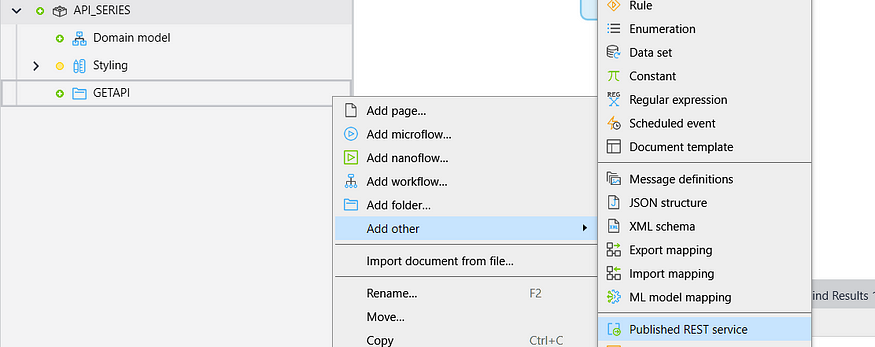
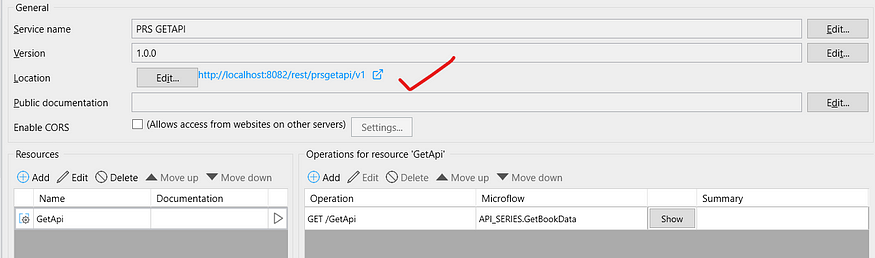
Go to MX Studio Pro create a folder GETAPI -> right click on it-> click on other->Published Rest Service & give the name PRS_GETAPI.
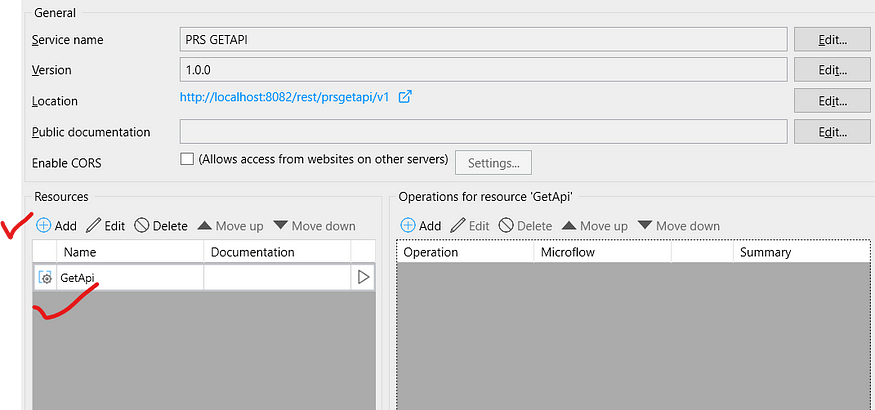
Now go to PRS_GETAPI-> add resources & give any name(GetApi).
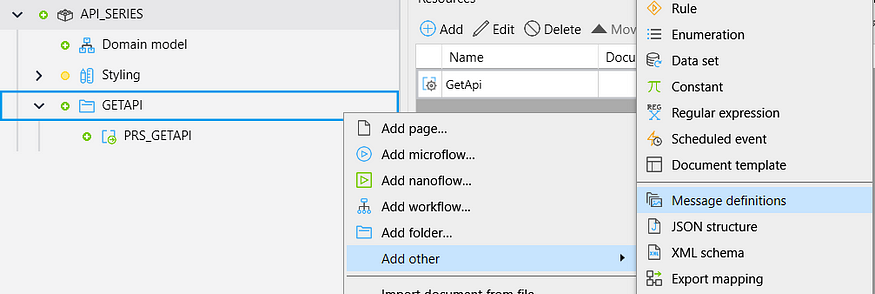
Go to GETAPI folder -> right click-> other->Click on Message Definition & give any name(MD_Book).
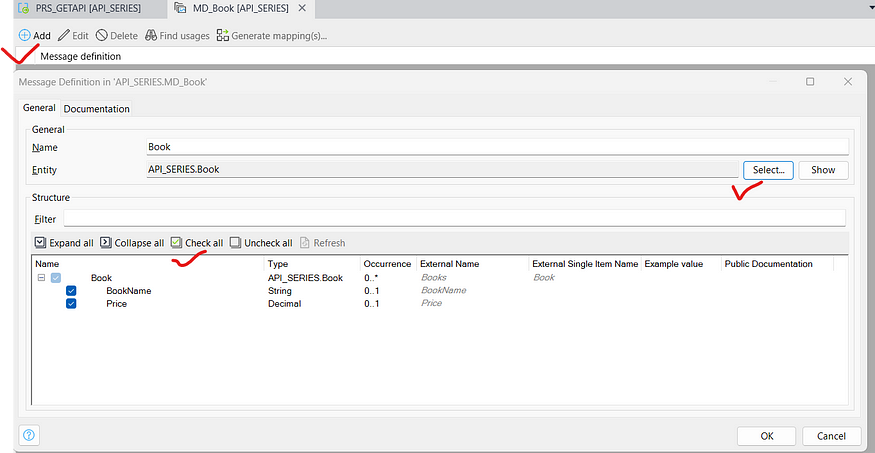
Open MD_Book(Message Definition) -> Click Add->Select your Book Entity & Check All attribute and click ok.
Go to again MD_Book(Message Definition) -> Select Book -> Click on Generate mapping to generate the export mapping and select only export mapping for this tutorial & click ok.
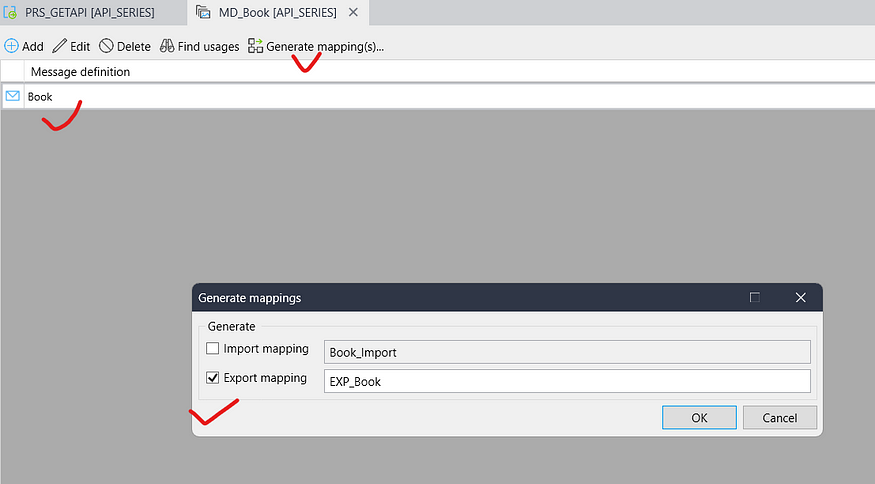
You can see your export mapping.

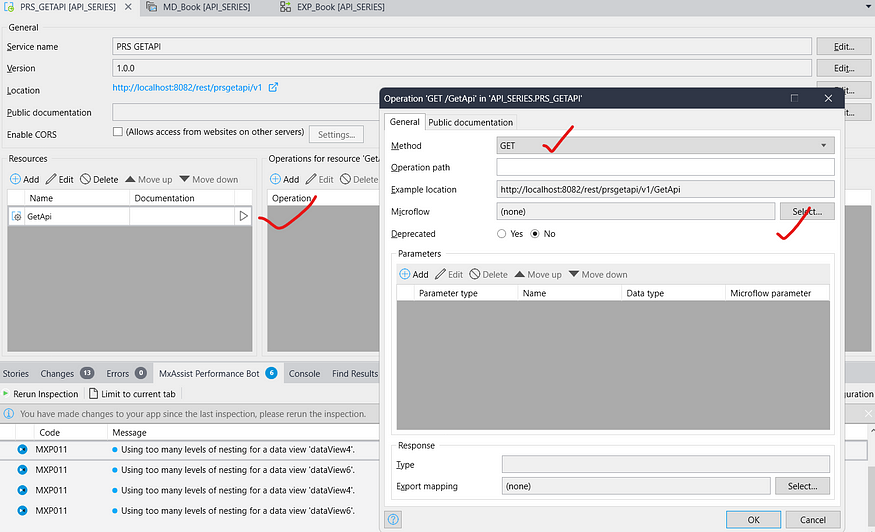
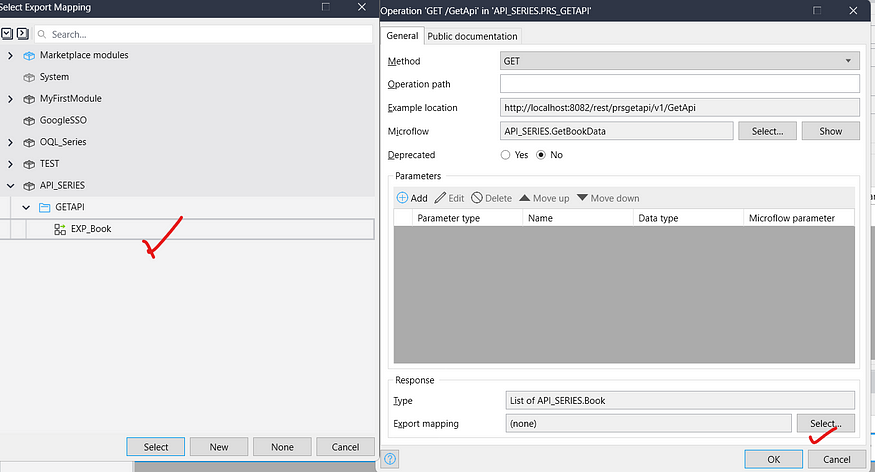
Now go to PRS_GETAPI-> Add operations for ‘GetApi’-> Select GET Method & in the microflow create a new microflow(GetBookData).
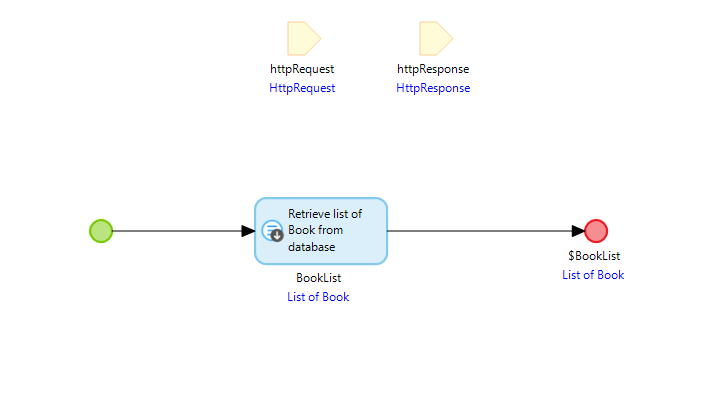
Now open your GetBookData microflow
- Take a retrieve activity inside this microflow -> retrieve data from database -> select your Book entity.
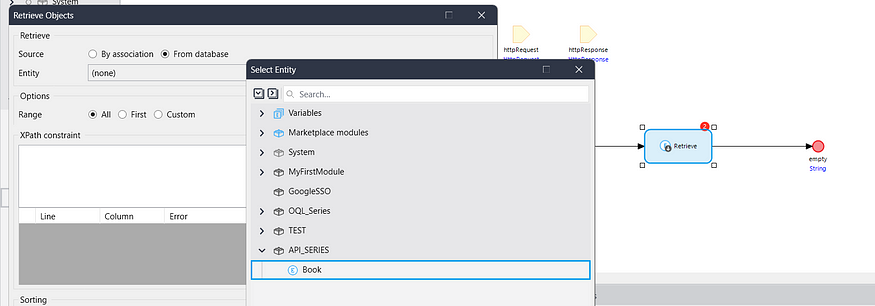
2. Now return the BookList
Go to again PRS_GETAPI -> Open your GET operation -> Select your Export mapping(EXP_Book) & Click OK.
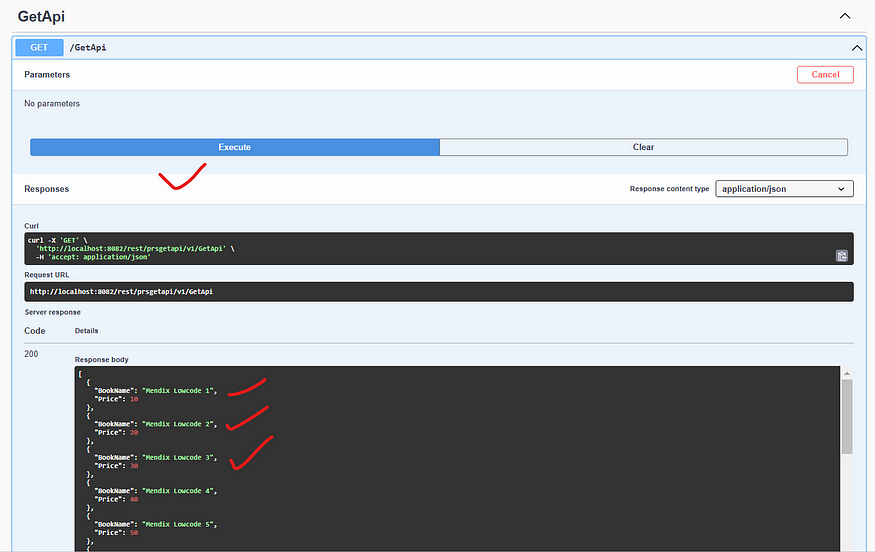
Now Run the application & test it.
Go to your PRS_GETAPI & Click on the link and Execute the API.
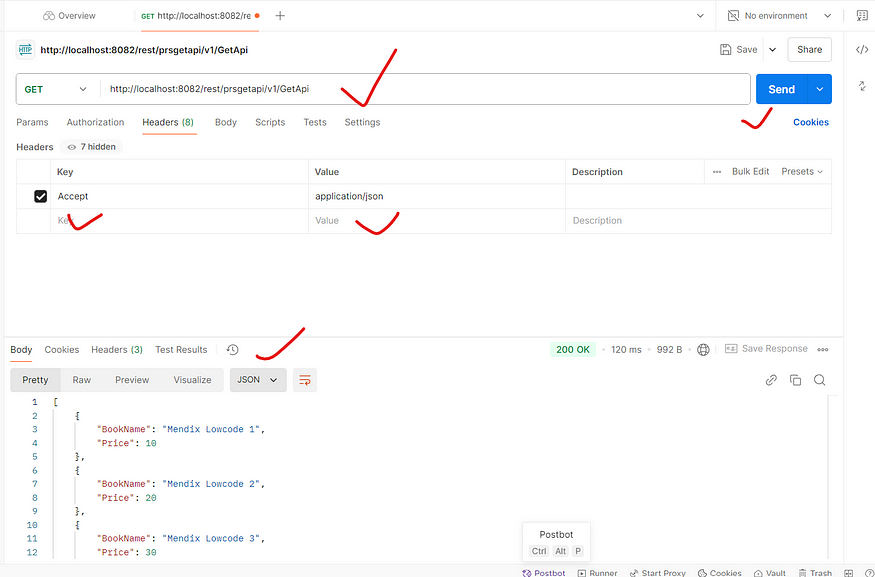
You can also test this API in PostMan.
Conclusion:
I hope this article has helped you understand How to Implement GET API in Mendix.
Thanks for reading this! See you in the next blog post.