

Introduction to Object Query Language in Mendix is the starting point for understanding how to retrieve, filter, and manipulate data using OQL (Object Query Language) within Mendix applications. This blog covers the fundamentals of OQL, explaining its purpose, syntax, and practical use cases. Whether you’re a beginner looking to streamline data queries or an experienced Mendix developer aiming to enhance your application’s performance, this guide lays a strong foundation.
First create the Mendix application in any version. Here, I am using 9.24.5
-> Open Mendix studio pro
-> Create new app
-> Select Blank web app
Dependencies: -
install this module from Mendix marketplace.
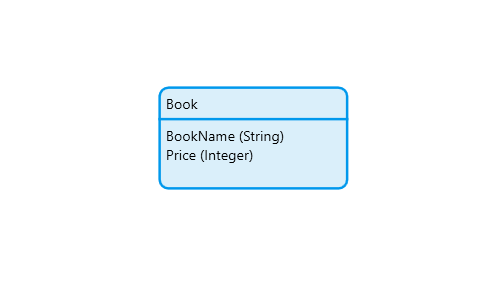
Go to MX Studio Pro and create an entity & give any name like “Book” & add your data.
Writing our first OQL statement :-
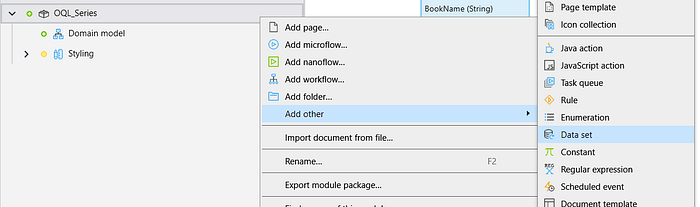
Right click on MyFirstModule or YourModuleName(OQL_Series) -> Add Other -> Data Set -> give any name(FirstOQL_Statement) & Click Ok.
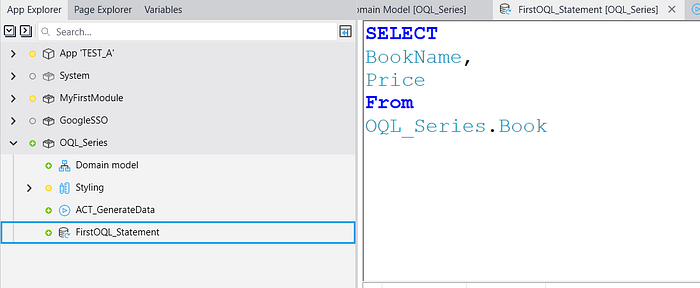
Open your FirstOQL_Statement data set by double clicking and write the below OQL statement
SELECT
BookName,
Price
From
OQL_Series.Book
IMPORTANT :- BookName & Price are the attribute name please give the same name which are available in the entity, OQL_Series is the module name & by using a dot(.) you can select your entity.
Make a microflow to execute the OQL, Right click on OQL_Series -> add microflow -> give the name DS_Book.

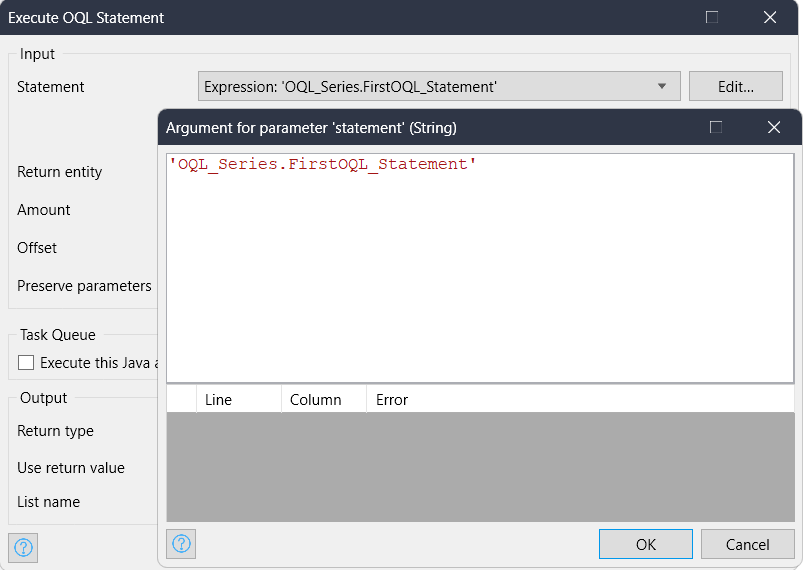
Go to microflow -> search Execute OQL Statement -> Drag the activity & configure the value and return the $BookList.
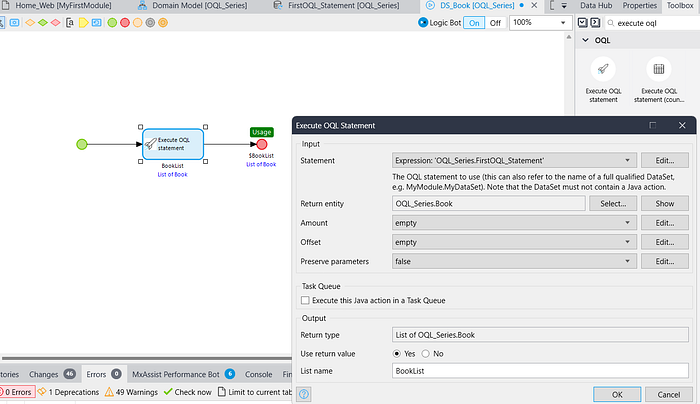
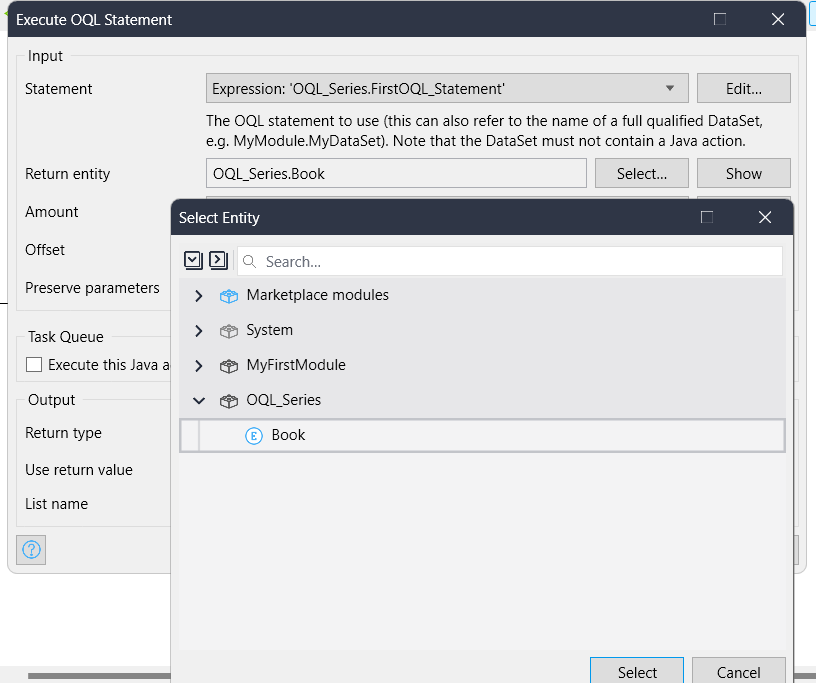
- In the Statement ‘OQL_Series.FirstOQL_Statement’ (OQL_Series is your module name & FirstOQL_Statement is your dataset name which is accessible by dot{.} ).
- In the Return entity select your Book entity.
- Set Amount & Offset( If you want otherwise keep them empty) and keep preserve parameters false.
Congrats, you’ve written your first OQL statement!
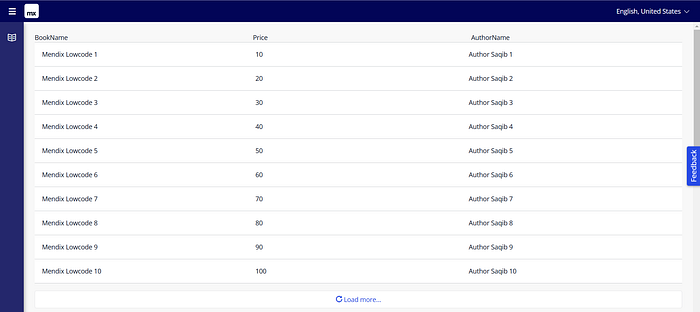
Now make a page to show the data for testing.
Go to navigation -> Add new item, in the onClick event select “show a page” & create a new page “Book_Overview”.

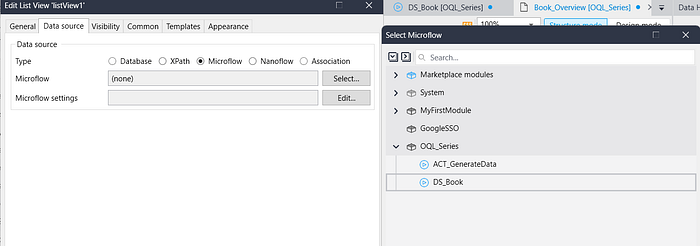
Go to your Book_Overview page -> take a ListView -> select dataSource as microflow -> select your DS_Book microflow.
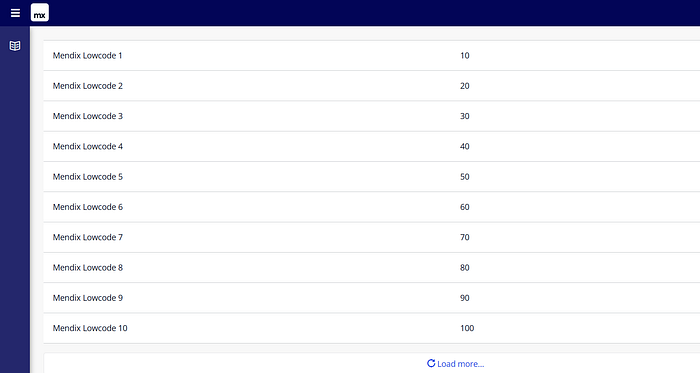
Now run the application & test it.
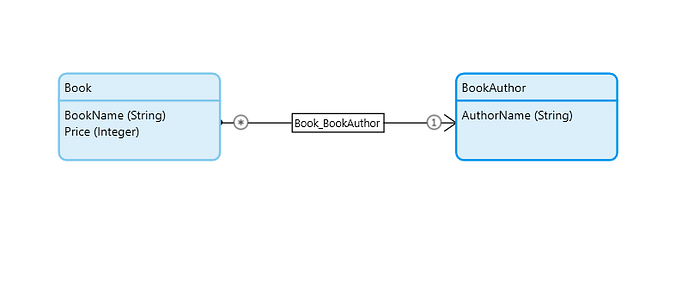
OQL STATEMENT WITH ASSOCIATION:-
Create your entity with association as you want
Right click on MyFirstModule or YourModuleName(OQL_Series) -> Add Other -> Data Set -> give any name(OQL_WithAssociation) & Click Ok.
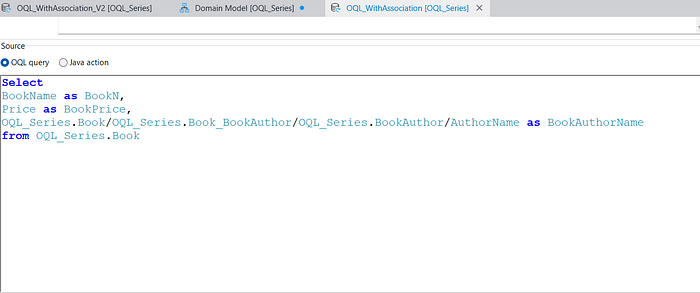
Open your OQL_WithAssociation data set by double clicking and write the below OQL statement.
- First Way :-
Select
BookName as BookN,
Price as BookPrice,
OQL_Series.Book/OQL_Series.Book_BookAuthor/OQL_Series.BookAuthor/AuthorName as BookAuthorName
from OQL_Series.Book
2. Second Way :-
Select
BookName as BookN,
Price as BookPrice,
C.AuthorName AS BookAuthorName
from OQL_Series.Book as B
left join B/OQL_Series.Book_BookAuthor/OQL_Series.BookAuthor as C

IMPORTANT :- BookName , Price & AuthorName are the persistable entity attribute name please give the same name which are available in the entity, OQL_Series is the module name & by using a dot(.) you can select your entity.
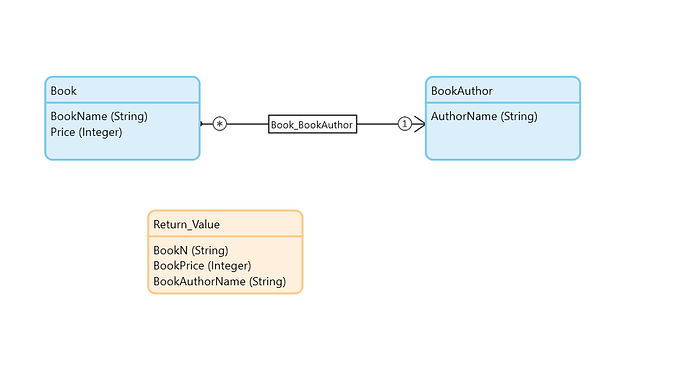
Whenever you use “as” keyword(BookName as BookN) you have to make a Non persistable entity to return & please keep the NPE attribute name same as which you are using after “as” keyword(BookN).
Whenever you are working with association you have to use “as” keyword(BookName as BookN) & need to make NPE to return, without “as” keyword you are not able to write the OQL Query.
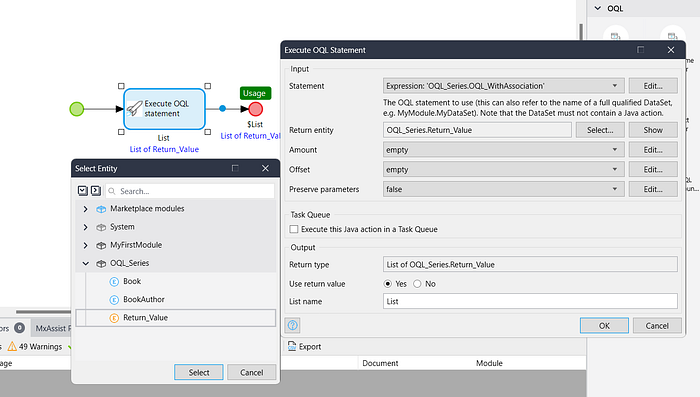
Make a microflow to execute the OQL, Right click on OQL_Series -> add microflow -> give the name DS_BookWithAssociation.
Now, follow the above logic, how we can execute the OQL and display the data on a page.
Conclusion:
I hope this article has helped you understand How we can write first OQL statement in Mendix.
Thanks for reading this! See you in the next blog post.